Accessing shared resources between devices in your local area network changes how you work with digital files. It makes sharing and working together on files across computers easy.
Need to move documents between computers or access media from different devices? Local network access is the answer. It makes sharing files smooth, without needing cloud services or external storage.
This guide will show you how to see and connect to other computers on your network. You’ll discover how to see computers on network and set up reliable connections for sharing files.
By following these steps, you’ll make your digital workspace more efficient. Resources will be easy to access on all your devices.
Understanding Network Discovery and File Sharing
Before you start setting up your devices, it’s key to know how computers find and talk to each other on a network. This knowledge is vital for sharing files between systems.
What is Network Discovery?
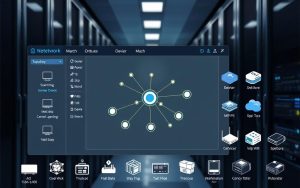
Network discovery is a setting that lets your computer see other devices on the same network. It also lets those devices see yours. With it on, you can easily network browse and access resources.
Think of network discovery as a digital introduction service for your devices. Without it set up right, computers act like they’re alone, even if they’re connected to the same network.
Common Network Sharing Protocols
Different operating systems use different protocols for sharing files over networks. These protocols set the rules and ways for data to move between devices.
The SMB protocol (Server Message Block) is key for file sharing on Windows. It lets Windows machines share files and printers and is used on many platforms.
Older macOS systems used the AFP protocol (Apple Filing Protocol) for sharing files. But now, modern macOS uses SMB for better sharing across platforms. It also keeps support for AFP in some cases.
| Protocol | Primary Use | Platform Support | Current Status |
|---|---|---|---|
| SMB | Windows file sharing | Windows, macOS, Linux | Industry standard |
| AFP | Traditional macOS sharing | Primarily macOS | Legacy support |
| NFS | Unix/Linux sharing | Cross-platform | Enterprise environments |
Knowing about these protocols is a big help when you’re fixing connection problems or making file transfers faster between different systems on your network.
Prerequisites for Network File Sharing
Before you can share files, you need to set up a few basics. Getting these right helps avoid common problems. It makes sharing files across your network easy and smooth.
Network Connectivity Requirements
All devices must be on the same local network for file sharing. This means they should all use the same router, whether via Wi-Fi or Ethernet cables.
Make sure each device is set to a private network profile, not public. This lets them find each other, which public networks block for safety.
Check if devices can talk to each other over the internet. Use simple command line tools to see if they can communicate well.

Computer Naming and Workgroup Settings
Each computer needs a unique name on the network. This name helps others know which machine they’re accessing when they look for network resources.
In Windows, all computers should be in the same workgroup. This makes it easier to find and access devices.
Here are some tips for naming computers well:
| Setting Type | Requirement | Example | Purpose |
|---|---|---|---|
| Computer Name | Unique identifier | OFFICE-PC-01 | Device identification |
| Workgroup Name | Identical across devices | WORKGROUP | Network grouping |
| Name Length | 15 characters maximum | N/A | Compatibility |
| Special Characters | Avoid most symbols | Use hyphens only | Prevent errors |
These basics are key for successful file sharing. Setting them up right makes everything else easier.
How to See Another Computer on the Same Network in Windows
To see other computers on your network, you need to set up Windows correctly. This involves three main steps. These steps make sure your devices can see and talk to each other.
Enabling Network Discovery in Windows 10/11
Network discovery lets your computer find other devices and be seen by them. Here’s how to turn it on:
- Open File Explorer and select Network from the left navigation pane
- Click the yellow notification bar that appears at the top
- Choose “Turn on network discovery and file sharing”
- Select the option for your current network type (private networks work best for sharing)
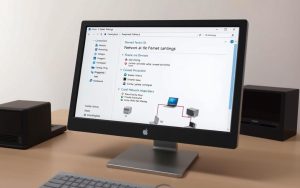
You can also use the Control Panel. Go to Network and Sharing Center, then click “Change advanced sharing settings.” Here, you can adjust discovery settings for different network types.
Turning on network discovery doesn’t share your files. It just makes your computer visible to others. For full Windows file sharing, you need to set up more settings.
Configuring File and Printer Sharing Settings
With discovery on, you must set up sharing permissions. These settings decide what others can see on your computer.
In the Advanced Sharing Settings menu, find the “File and printer sharing” section. Make sure this is turned on for your network type. This lets others see and use your shared folders and printers.
For more control, you can share specific folders:
- Right-click any folder you want to share
- Select “Properties” then navigate to the “Sharing” tab
- Click “Advanced Sharing” to set permissions and user limits
- Apply your changes and note the network path for access
Accessing Shared Resources from Windows
With discovery and sharing on, you can find and connect to other computers. Open File Explorer and select Network from the navigation pane. After a short scan, other devices should show up.
Double-click any computer icon to see its shared folders and printers. You might need to enter login details if the remote computer asks for them. These are usually the username and password of an account on that machine.
If you know the exact name of the computer you want to access, type “\\computername” in File Explorer’s address bar. This often works when computers don’t show up automatically in the network view.
For easy access, you can map network drives. Right-click a shared folder and choose “Map network drive” to make it a permanent connection.
Accessing shared folders on Windows networks needs all these steps to work. Sometimes, it takes patience as network browsing can take a few minutes to fill up completely.
Network File Sharing on macOS
Apple’s macOS makes sharing files between devices easy. It has tools for sharing local resources and accessing Windows files. Here, we’ll show you how to set up file sharing on macOS.
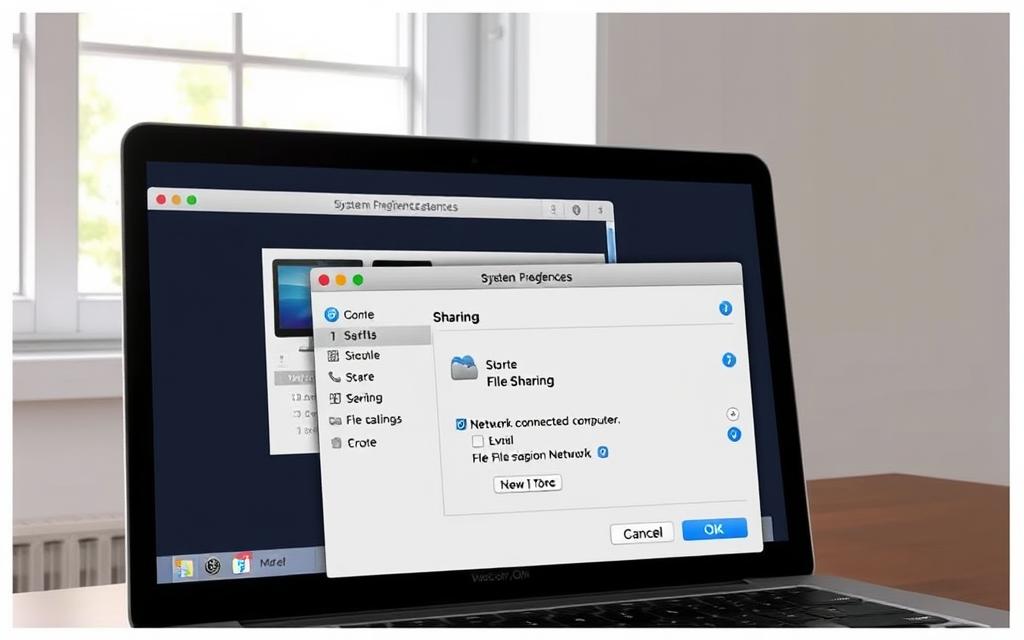
Setting Up File Sharing on macOS
To start, go to System Settings. Then, click General > Sharing and turn on File Sharing. This makes your Mac visible on the network.
To share a folder, click the “+” under Shared Folders. Pick the folder you want to share. You can share many folders as needed.
After choosing folders, manage user permissions. For each folder, decide who can do what. macOS has three permission levels:
- Read & Write: Users can view, modify, and delete files
- Read Only: Users can view files but cannot make changes
- Write Only: Users can add files but cannot see existing content
Creating a special user account for sharing folders is a good idea. It keeps your Mac safe while making access easy for others.
| Permission Level | File Viewing | File Modification | File Deletion | Recommended Use |
|---|---|---|---|---|
| Read & Write | Yes | Yes | Yes | Collaborative folders |
| Read Only | Yes | No | No | Reference materials |
| Write Only | No | Yes | No | Drop boxes |
Accessing Windows Shares from macOS
Connecting to Windows shares from a Mac is easy. You can use Finder’s network browsing. Open Finder and look for the Network section in the sidebar.
For direct connections, use “Connect to Server” from Finder’s Go menu. Type the Windows computer’s address with smb://. For example: smb://192.168.1.105 or smb://OFFICE-PC.
After connecting, enter your Windows username and password. macOS will remember these for future use, making access easier.
Once connected, the Windows folder appears on your Mac desktop. It works like a local drive, allowing you to manage files easily. This makes macOS great for mixed networks.
To keep connections active, add Windows shares to your Login Items. This ensures they reconnect automatically when you start your Mac.
Troubleshooting Common Network Sharing Issues
Network file sharing problems can really slow you down. They can make it hard to work together when computers don’t show up or you can’t get into shared files. Here, we’ll look at some easy fixes for common network sharing issues.
Computers Not Appearing in Network
Having network sharing not working can be frustrating. It might be because of the network profile type. This is a common reason why computers not showing on network lists.
Windows has different network profiles: Public, Private, and Domain. Public networks often block device discovery for security. Make sure your network is set to Private to see all devices.
Firewalls can also get in the way. Check if File and Printer Sharing is allowed in your firewall settings. You might need to make exceptions for Windows Firewall or other security programs.
Router settings can also affect visibility. Some routers hide devices by default or have security features that stop them from talking to each other. Look in your router’s settings to see if anything is blocking visibility.
Make sure network services are running right on all devices. Services like Function Discovery Provider Host and SSDP Discovery should start automatically. Restarting these services can help fix visibility problems.
| Issue Type | Possible Cause | Recommended Solution |
|---|---|---|
| No devices visible | Network set to Public profile | Change network location to Private |
| Intermittent visibility | Firewall blocking ports | Allow File and Printer Sharing in firewall |
| Specific computer missing | Network discovery disabled | Enable network discovery in advanced settings |
| All computers missing | Router isolation enabled | Disable AP isolation in router settings |
Permission and Access Problems
Permission issues can lead to access denied error messages. These problems usually come from mismatched credentials or wrong permissions.
Make sure user account permissions match on both the accessing computer and the sharing device. The username and password should match an account on the target computer with the right sharing rights.
Credential Manager in Windows can store old or wrong network credentials. Clearing these and re-entering them can fix access problems.
Share permissions and NTFS permissions work together to control access. Both must allow access for the user. Check both share-level and security-level permissions on the problem resources.
Password-protected sharing settings affect how you log in. When enabled, you need a valid user account on the host computer. Disabling this feature lets anyone access but lowers security.
Account lockout policies can block access after too many failed login attempts. If you’ve tried wrong passwords before, your account might be locked. Waiting or asking your network admin can help.
Make sure all devices are in the same workgroup or homegroup. This is important unless you’re in a domain environment. Different workgroups can cause login problems.
Security Considerations for Network File Sharing
Network sharing is convenient but needs careful security to stop unwanted access. Good protection keeps your files safe for only those who should see them. It also guards your network against threats.
Setting Appropriate Permissions
File permissions are key to secure file sharing. Always give users the least access they need. This means they only get the permissions they must have for their tasks.
For important documents, it’s wise to limit access to just reading. Many systems let you set different permissions for different groups. Checking these settings often keeps your security up to date.
Windows and macOS give you detailed control over file permissions. You can decide who can read, edit, or delete files. This stops others from changing your files by mistake or on purpose.
Network Security Best Practices
There are more steps to keep your network sharing security strong. These steps add layers of protection to your shared files.
Follow these important security tips:
- Use strong, unique passwords for all user accounts
- Keep operating systems and security software updated
- Enable network encryption (WPA2 or WPA3 for wireless networks)
- Disable guest access unless absolutely necessary
- Regularly audit shared folders and access logs
Network encryption keeps data safe as it moves between computers. Modern Wi-Fi like WPA3 stops hackers from listening in. Wired networks need physical security for their equipment.
System updates fix known security holes that hackers might use. Automatic updates save you from having to do it all yourself. Together, these steps make a strong plan for secure file sharing on your network.
Conclusion
Setting up reliable network file sharing between computers needs careful steps on both Windows and macOS. You must enable network discovery, adjust sharing settings, and make sure workgroups match for easy connection. This ensures your network works smoothly.
When computers don’t show up in network lists or hit permission walls, troubleshooting is key. Being patient and checking firewalls, network discovery, and sharing permissions can fix these issues. It’s all about methodical checks.
Remember, security is vital when sharing files. Use the right permissions and follow security tips to keep your data safe. This way, you can share files with those who need them, while keeping others out.
By following these basic steps, you can manage file sharing well in your home or office. You’ll get quick access to files and media on all connected devices.
FAQ
What is Network Discovery and why is it important?
Network Discovery lets your computer find other devices on the same network. It also lets them find yours. This makes sharing files and resources easy, helping you work together better.
Which protocols are commonly used for network file sharing?
Windows uses Server Message Block (SMB) for file sharing. macOS used Apple Filing Protocol (AFP) before, but now it mainly uses SMB too. This makes sharing files easier between different systems.
What are the basic requirements for setting up network file sharing?
Devices need to be on the same network, either by Wi-Fi or Ethernet. They should have a private network profile. Each device must have a unique name. For Windows, all PCs should be in the same workgroup.
How do I enable Network Discovery in Windows 10 or 11?
To enable Network Discovery in Windows, use File Explorer or the Network and Sharing Centre. Go to the advanced sharing settings. Make sure Network Discovery is on for your private network.
How can I access shared folders on a Windows PC from my Mac?
Open Finder on your Mac and use “Connect to Server”. Type the SMB address of the Windows PC (like smb://computername). Then, enter your login details to access the shared folders.
Why can’t I see other computers on my network even after enabling discovery?
Issues like an incorrect network profile or firewall settings can cause this. Make sure all devices are on the same network. Also, check that sharing settings are correct.
What should I do if I receive a “permission denied” or “access error” when trying to access a shared folder?
Check if the user account has the right sharing permissions. Ensure the username and password are correct. If the account is locked, try re-entering your details or adjust the sharing permissions.
How can I ensure my network file sharing setup is secure?
Use strong, unique passwords for all accounts. Only give necessary permissions (like read-only access). Keep your system and software updated. Use modern encryption like WPA2 or WPA3 for your network.
Can I share files between Windows and macOS devices on the same network?
Yes, both systems support SMB for file sharing. Windows PCs can share folders with Macs, and vice versa. Just make sure the right settings and permissions are in place.
What is a workgroup, and does it affect file sharing in Windows?
A workgroup is a group of computers on a local network that can find and talk to each other easily. For Windows file sharing, all computers should be in the same workgroup. This makes sharing files simpler.


