Having trouble seeing your device on the local network can be really annoying. This is a common problem for many Windows 10 users. They expect easy connection between their devices.
When your computer doesn’t show up on the network, it messes with file sharing and printer use. This makes work harder. The good news is, it’s usually a simple setting issue, not a hardware problem.
This guide will help you fix network discovery problems step by step. You’ll learn about key settings, service tweaks, and security changes. These will help your device show up on the network again.
Follow our expert advice to quickly fix these connection issues. Get your system working well with other network devices again.
Common Reasons You Can’t Find Your Computer on Network in Windows 10
When your computer vanishes from the network, several technical issues usually cause this problem. Knowing these reasons helps you fix the issue effectively.
Network Discovery and Sharing Settings Issues
Incorrect network sharing settings are a common reason for network visibility problems. Windows 10 needs network discovery enabled for your device to show on the network.
Many users set their network as “Public” by mistake. This disables discovery features for security. It lets you access the internet but hides your computer from others.
The table below shows how different network profiles affect discovery settings:
| Network Profile | Network Discovery | File Sharing | Security Level |
|---|---|---|---|
| Private | Enabled | Allowed | Moderate |
| Public | Disabled | Blocked | High |
| Domain | Controlled by admin | Controlled by admin | Variable |
Firewall or Security Software Interference
Windows firewall blocking important network protocols can cause issues. Windows Defender Firewall might block legitimate traffic, hiding your computer from the network.
Third-party security apps can also cause problems. Antivirus software like ESET NOD32 and VPNs, including NordVPN, have features that hide your device from the network. NordVPN’s “Invisibility on LAN” setting, for example, makes your device invisible to other computers.
These security features create a barrier around your computer. They stop discovery requests but allow internet access.
Outdated Drivers or System Software
Outdated network drivers can cause compatibility issues. Manufacturers often update drivers to fix bugs and improve compatibility with new network standards.
Old drivers might not work with network discovery protocols. This means your computer can’t announce its presence or respond to other devices.
System software updates are also important. Microsoft releases patches that affect network visibility. Missing these updates can lead to bugs that disrupt network discovery.
Essential Preliminary Checks
Before we get into the complex stuff, let’s sort out the simple issues. Basic physical and network problems often fix network visibility problems. You don’t need to go deep into troubleshooting for this.
Verify Physical Network Connections
A good physical connection is key for network communication. First, check all Ethernet cables for damage or loose connections.
For wireless, make sure your Wi-Fi signal is strong. A weak signal can cause problems with network discovery.
Checking Cables and Wi-Fi Signal
Here’s how to check your physical connections:
- Look for frayed or bent Ethernet cable pins
- Make sure cables fit well in ports
- Check your Wi-Fi signal strength in settings
- If the signal is weak, try moving closer to your router
Confirm All Devices Are on the Same Network
For network discovery to work, all devices must be on the same network. This means they should be on the same subnet and workgroup.
If devices are on different networks or subnets, they won’t see each other, even with correct settings.
Using IP Config to Verify Network Details
The ipconfig command gives you important network info. Here’s how to use it:
- Open Command Prompt as an admin
- Type “ipconfig” and hit Enter
- Write down your IPv4 Address and Subnet Mask
- Compare these with other devices on your network
Devices need the same first three numbers in their IP address and the same subnet mask. This means they’re on the same network segment.
Also, check that all computers are in the same workgroup. You can find this in System Properties under Computer Name.
These basic checks help figure out if your network setup supports discovery. Then, you can look into software solutions.
Step-by-Step Guide to Enable Network Discovery
Setting up your network settings right is key to making your computer show up on the network. This guide will show you how to make your Windows 10 machine visible to other computers.
Access Advanced Sharing Settings
Windows 10 has two main ways to get to the advanced sharing settings. Knowing both helps you set up your system, no matter your preference.
Navigating Control Panel vs Settings App
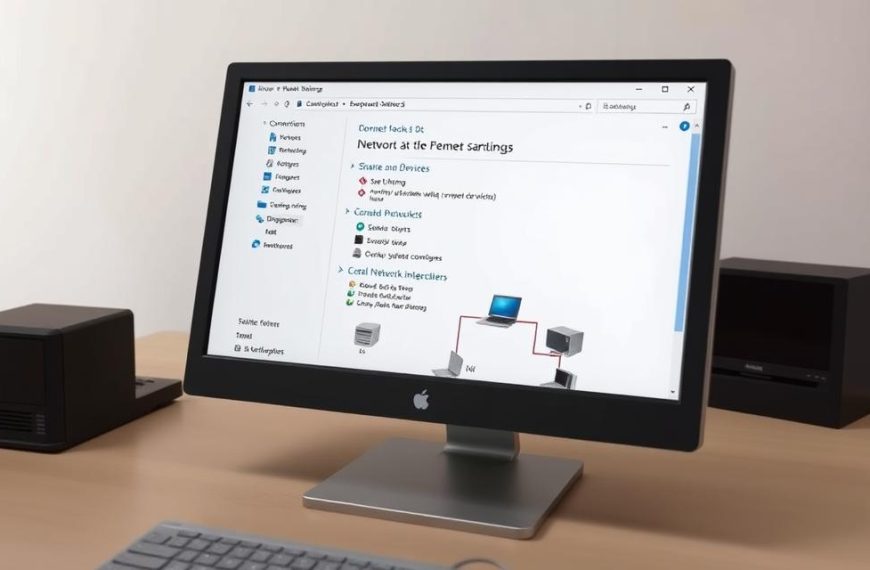
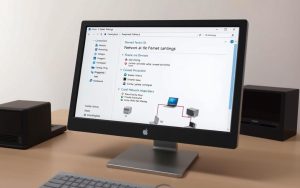
The old way is using Control Panel. Open it and go to Network and Sharing Center. Then, click on ‘Change advanced sharing settings’ in the left sidebar.
The new way is the Settings app. Press Windows key + I, then choose Network & Internet. Click on ‘Sharing options’ under your active network connection. Both paths take you to the same place.
Configure Network Profile as Private
Your network profile type affects how visible your device is. Public networks hide your device for safety. Private networks let devices find each other and share files.
Switching from Public to Private Network
To set network to private, first check your network profile in Network & Internet settings. If it’s public, change it to private.
This change lets your computer be found by others. It keeps your network safe for home or work.
Turn on Network Discovery and File Sharing
With your network private, you can turn on the main feature for visibility. These settings help your network talk to each other properly.
Ensuring Correct Permissions
In the advanced sharing settings window, expand the Private profile section. Turn on ‘Turn on network discovery’ and ‘Turn on file and printer sharing’.
For better sharing, enable ‘Allow Windows to manage homegroup connections’ if you use homegroup networking. These settings fix many network visibility problems when set right.
Don’t forget to save your changes before leaving the settings window. Your computer should now be seen by other devices on the same private network.
Adjusting Windows Services for Network Visibility
Windows needs several background services to show your computer on the network. These services help find other devices. If they don’t work right, your computer might not show up.

Restart Critical Services
Some services are key for finding other computers. The Function Discovery Provider Host and Function Discovery Resource Publication services help. The SSDP Discovery service is also important for finding devices on local networks.
If these services stop, your computer won’t be seen. Restarting them often fixes the problem.
Using Services.msc to Manage Services
You can manage these services through the Services management console. Press Windows Key + R, type services.msc, and press Enter. This opens a window with all Windows services.
Find these important services in the list:
- Function Discovery Provider Host
- Function Discovery Resource Publication
- SSDP Discovery
Right-click each service and choose Restart if it’s running. If it’s stopped, choose Start. This can quickly fix network visibility issues.
Set Services to Automatic Start
Restarting services is a quick fix. For a lasting solution, make these services start automatically when you turn on your computer. This stops network discovery problems after restarting.
Key Services: Function Discovery and SSDP
The function discovery service finds devices on your network. The ssdp discovery service uses Simple Service Discovery Protocol to find UPnP devices. Both are vital for network visibility.
To set automatic startup:
- Right-click the service in services.msc
- Select Properties
- Change Startup type to “Automatic (Delayed Start)”
- Click Apply and OK
This makes sure these services start soon after you turn on your computer. Your computer will always be seen on the network without needing you to do anything.
Configuring Windows Firewall and Security
Your security software might be blocking network discovery without you knowing. It’s there to protect you, but it can sometimes block too much. Getting the right settings is key to keeping safe without losing connection.
Allow Network Discovery Through Firewall
Windows Defender Firewall has special rules for network discovery. These rules help your computer talk to other devices. But if they’re not set right, they can stop you from seeing others.
You can change these windows firewall settings in two ways. The graphical interface is easy to use. For those who prefer, command-line options are quicker and more detailed.
Creating Exceptions in Firewall Settings
To set up exceptions, go to Windows Security and find the firewall settings. Here’s how:
- Open Windows Security from your system tray
- Select “Firewall & network protection”
- Click “Allow an app through firewall”
- Find “Network Discovery” in the list
- Make sure both Private and Public network boxes are checked
For those who like command lines, here’s a quick fix:
netsh advfirewall firewall set rule group=”Network Discovery” new enable=Yes
This command fixes many issues at once. Always check if network visibility works after making changes.
Check Antivirus Software Settings
Third-party security software often has its own firewalls. These can be stricter than Windows Defender. Knowing your antivirus network settings is important.
Programmes like Norton, McAfee, and Bitdefender have network protection. You can find these in the firewall or network settings of your security software.
Temporarily Disabling for Testing
Disabling your antivirus temporarily can help find network problems. Here’s how to do it safely:
- Disconnect from the internet before disabling protection
- Use the antivirus programme’s official disable function
- Test network discovery right after disabling
- Re-enable protection right after testing
- Never leave your system unprotected for long
If you see better network visibility, check your antivirus settings. Most programmes let you set network-specific permissions instead of disabling everything.
Security is important, but it shouldn’t stop you from connecting. Finding the right balance in your windows firewall settings is the goal.
Conclusion
Fixing the “can’t find my computer on network” issue in Windows 10 needs a careful plan. This guide covers key steps, from checking network connections to tweaking firewall settings. These actions help solve network computer problems well.
Enable network discovery, set up services, and check your security software to fix network visibility issues in Windows 10. Each step is important and builds on the last. Most people find their network working again by following these steps carefully.
If problems keep coming back, go through this guide again. Sometimes, small settings or updates are missed. With a bit of patience, you’ll get your network working smoothly again.
FAQ
Why can’t I see my Windows 10 computer on the network?
Issues often stem from network settings or firewalls. Outdated drivers or wrong network profiles can also hide your device. These problems stop your computer from showing up on the local network.
How do I check if all devices are on the same network?
Open the Command Prompt and type ipconfig. Look at the IPv4 addresses and subnet masks. They should match. Also, make sure all computers are in the same workgroup, usually WORKGROUP.
What is the difference between a Public and Private network profile in Windows 10?
Private networks are for trusted places like home or work. They allow sharing and discovery. Public networks, like cafes, are more secure but don’t share. Your computer should be set to Private for local network visibility.
Which Windows services are critical for network discovery?
Important services include Function Discovery Provider Host and others. They must be running and set to start automatically. This lets your computer find and be found by others on the network.
How can my firewall or antivirus software block network visibility?
Firewalls, like Windows Defender, can block discovery traffic. You might need to add exceptions in your security software. This lets your computer share and find devices on the network.
What should I do if my network adapter drivers are outdated?
Old drivers can cause problems. Check your PC manufacturer’s website for updates. You can also visit the network adapter vendor’s site, like Intel or Realtek, for the latest drivers.
Can a weak Wi-Fi signal affect network discovery?
Yes, a weak Wi-Fi can mess up network communication. Make sure your signal is strong. If not, try fixing your router or moving closer to it.
How do I temporarily disable my antivirus to test for network issues?
Open your antivirus software and find the option to disable it temporarily. This is usually in the settings or protection menus. Turn it back on as soon as you’re done to keep your computer safe.

